
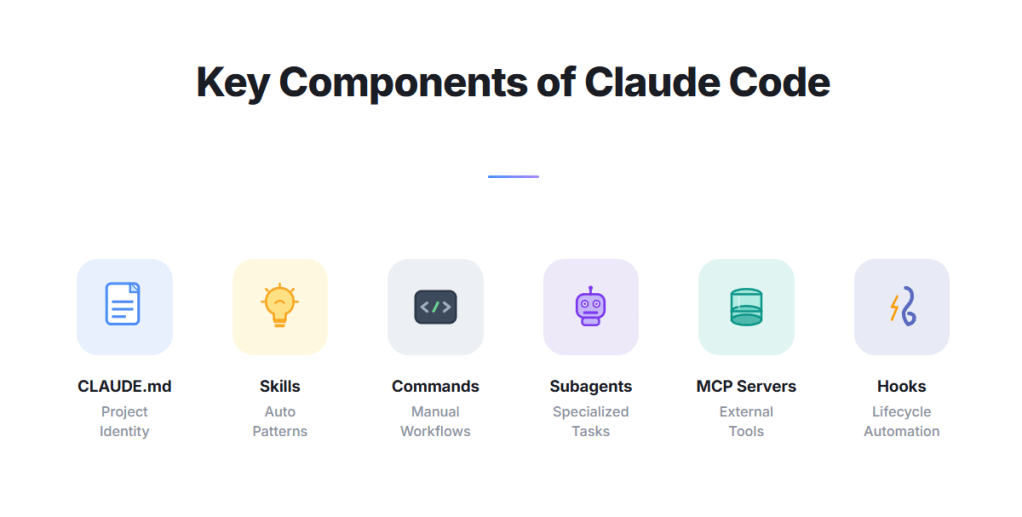
Claude Code Setup and Its Key Components
Software development is being redefined.
In the first part of this series, we explored why Claude Code is different — its agentic intelligence, full-project awareness, and strategic pillars.
Now it’s time to go hands-on.
This guide walks you through setting up Claude Code and understanding its most powerful components — so you can start using it like a professional from day one.
The Mindset Shift
Claude Code isn’t just a tool you install and run.
It’s a system you configure, teach, and extend.
The more intentional you are about setup, the more leverage you unlock.
Think of it this way:
A developer who configures Claude Code well gets an AI that knows their codebase, follows their standards, respects their boundaries, and works autonomously.
A developer who skips this step gets a very expensive autocomplete.
Let’s make sure you’re in the first group.
Installation
Claude Code runs as a CLI tool. You’ll need Node.js installed (v18 or higher).
npm install -g @anthropic-ai/claude-code
Once installed, navigate to your project directory and run:
claude
That’s it. You’re in.
Now let’s build the foundation.
Understanding Context: Project vs. Global
Before diving into the components, you need to understand one foundational concept: Claude Code has two configuration layers.
Project Context
Everything inside your project’s .claude/ folder and root CLAUDE.md is project-level context.
- Scoped to that specific project
- Checked into version control — shared with your team
- Overrides global settings where they conflict
Global Context
Everything inside ~/.claude/ (your home directory) is global context.
- Applies to every project on your machine
- Personal to you — not version controlled
- Sets your personal defaults and preferences
| Project Context | Global Context | |
|---|---|---|
| Location | .claude/ + CLAUDE.md |
~/.claude/ |
| Scope | One project | All projects |
| Shared with team? | Yes (via git) | No (personal) |
| Use for | Codebase rules, team standards | Personal preferences, global commands |
The rule of thumb: If it’s about the project → project context. If it’s about how you work → global context.
This distinction applies to every component that follows.
1. CLAUDE.md: Project and Global Memory
The single most impactful thing you can do as a beginner.
CLAUDE.md is a Markdown file that Claude Code reads automatically at startup — before it does anything else. Think of it as your AI onboarding document.
It exists at two levels:
- Project:
CLAUDE.mdat your project root — architecture, team standards, project-specific rules - Global:
~/.claude/CLAUDE.md— your personal working style and preferences that apply everywhere
What to put in your project CLAUDE.md
# Project Overview
This is a Node.js REST API for an e-commerce platform.
Primary language: TypeScript. Framework: Express. Database: PostgreSQL.

# Architecture
- /src/routes — API route handlers
- /src/services — Business logic
- /src/models — Database models

# Coding Standards
- Use async/await (no callbacks)
- Write unit tests for all service functions
- Follow RESTful conventions

# What NOT to do
- Do not modify the /legacy folder
- Do not use console.log in production code
- Do not change DB schema without running migrations
What to put in your global ~/.claude/CLAUDE.md
# My Preferences
- I prefer concise explanations over verbose ones
- Always suggest tests when modifying logic
- Use British English spelling in all documentation
Why it matters
Claude Code has no memory between sessions by default.
Without CLAUDE.md, you repeat yourself every single time.
With it, Claude always knows exactly what project it’s working on, how you like to code, and what lines not to cross.
Create this file on day one. Update it as your project evolves.
2. Settings & Permissions
Claude Code gives you fine-grained control over what it can and can’t do autonomously.
Where settings live
| Level | Location | Purpose |
|---|---|---|
| Project | .claude/settings.json |
Project-specific permissions, hooks, MCP servers |
| Global | ~/.claude/settings.json |
Personal defaults across all projects |
Project settings take precedence over global settings.
{
  "permissions": {
    "allow": [
      "Bash(npm run test)",
      "Bash(npm run lint)",
      "Read(**)",
      "Write(src/**)"
    ],
    "deny": [
      "Bash(rm -rf **)",
      "Write(.env)"
    ]
  }
}
Key permission types
Read — What files Claude can access. Write — What files Claude can modify. Bash — What terminal commands Claude can execute.
The golden rule
Start restrictive, then open up as you build trust.
Allow Claude to run tests and linters. Restrict it from touching environment files or infrastructure configs until you’re confident.
This is the equivalent of onboarding a new developer — you don’t give them production access on day one.
3. Commands: Your Custom Shortcuts
Commands are pre-written Markdown instructions triggered with a / slash prefix inside Claude Code. They support YAML frontmatter for configuration and dynamic placeholders for arguments.
They exist at two levels:
| Level | Location | Invoked as |
|---|---|---|
| Project | .claude/commands/<name>.md |
/project:<name> |
| Personal | ~/.claude/commands/<name>.md |
/<name> |
Creating a project command
Create .claude/commands/fix-issue.md:
---
description: Fix a GitHub issue by number
argument-hint: [issue-number]
allowed-tools: Read, Grep, Glob, Bash(git *), Bash(gh *)
---

Fix GitHub issue #$ARGUMENTS following our coding standards.

## Context
- Issue details: !`gh issue view $ARGUMENTS`
- Current branch: !`git branch --show-current`

## Steps
1. Read the issue description above
2. Find the relevant code
3. Implement the fix
4. Write tests
5. Create a commit referencing issue #$ARGUMENTS
Type /project:fix-issue 42 — Claude receives the issue details inline and starts working.
Key features used above:
$ARGUMENTS— replaced with whatever you type after the command (42)!`command`— runs the shell command before Claude sees the prompt, injecting live outputallowed-tools— grants Claude permission to use specific tools without askingargument-hint— shows[issue-number]as autocomplete hint in the CLI
Creating a personal command
Create ~/.claude/commands/explain.md:
---
description: Explain selected code in plain English
allowed-tools: Read, Grep, Glob
---

Explain the selected code in plain English.
Focus on what it does, why it exists, and any non-obvious logic.
Keep it concise — one paragraph unless complexity requires more.
Now /explain is available in every project you work on.
Argument placeholders
| Placeholder | Description |
|---|---|
$ARGUMENTS |
Everything typed after the command name |
$ARGUMENTS[0], $0 |
First argument |
$ARGUMENTS[1], $1 |
Second argument |
!`command` |
Runs a shell command and injects its output |
Example with positional arguments — .claude/commands/compare.md:
---
description: Compare two files side by side
argument-hint: [file1] [file2]
---

Compare $0 and $1. Highlight meaningful differences and explain
what changed and why it might matter.
Usage: /project:compare src/old.ts src/new.ts
Commands turn Claude Code from a conversation into a workflow engine.
4. Hooks: Automate at Every Step
Hooks let you run automatic actions at specific lifecycle points — without you having to ask. They fire before or after Claude uses a tool, when a session starts, when Claude finishes a task, and more.
Hook structure
Hooks are configured in .claude/settings.json with three levels of nesting: event → matcher → handler(s).
{
  "hooks": {
    "<EventName>": [
      {
        "matcher": "<regex pattern>",
        "hooks": [
          {
            "type": "command",
            "command": "your-shell-command",
            "timeout": 600
          }
        ]
      }
    ]
  }
}
Key hook events
| Event | When it fires | Matcher filters on |
|---|---|---|
| PreToolUse | Before a tool call executes | Tool name (Bash, Edit|Write, mcp__.*) |
| PostToolUse | After a tool call succeeds | Tool name |
| Stop | When Claude finishes responding | — |
| Notification | When Claude sends a notification | Notification type |
| SessionStart | Session begins or resumes | How started (startup, resume, compact) |
| UserPromptSubmit | User submits a prompt | — |
The matcher is a regex — Edit|Write matches either tool, mcp__memory__.* matches all tools from the memory MCP server.
Example 1: Auto-format code after edits
{
  "hooks": {
    "PostToolUse": [
      {
        "matcher": "Edit|Write",
        "hooks": [
          {
            "type": "command",
            "command": "jq -r '.tool_input.file_path' | xargs npx prettier --write"
          }
        ]
      }
    ]
  }
}
Every time Claude edits or writes a file, Prettier auto-formats it. The hook receives the tool input as JSON on stdin — jq extracts the file path.
Example 2: Block destructive commands
{
  "hooks": {
    "PreToolUse": [
      {
        "matcher": "Bash",
        "hooks": [
          {
            "type": "command",
            "command": "bash -c 'COMMAND=$(jq -r .tool_input.command); if echo \"$COMMAND\" | grep -q \"rm -rf\"; then echo \"{\\\"hookSpecificOutput\\\":{\\\"hookEventName\\\":\\\"PreToolUse\\\",\\\"permissionDecision\\\":\\\"deny\\\",\\\"permissionDecisionReason\\\":\\\"Destructive command blocked by hook\\\"}}\" && exit 0; fi; exit 0'"
          }
        ]
      }
    ]
  }
}
Exit code 0 with a permissionDecision: "deny" in the output blocks the action. Exit code 2 also blocks the action (stderr is fed back to Claude).
Example 3: Log all Bash commands
{
  "hooks": {
    "PostToolUse": [
      {
        "matcher": "Bash",
        "hooks": [
          {
            "type": "command",
            "command": "jq -r '.tool_input.command' >> ~/.claude/command-log.txt"
          }
        ]
      }
    ]
  }
}
Example 4: Re-inject context after compaction
{
  "hooks": {
    "SessionStart": [
      {
        "matcher": "compact",
        "hooks": [
          {
            "type": "command",
            "command": "echo 'Reminder: use Bun, not npm. Run bun test before committing.'"
          }
        ]
      }
    ]
  }
}
When the context window compacts, this hook re-injects key reminders so Claude doesn’t forget.
Three hook handler types
| Type | What it does |
|---|---|
command |
Runs a shell command. Input JSON on stdin. |
prompt |
Sends a prompt to a fast LLM (Haiku) to evaluate the action. |
agent |
Spawns a subagent to verify the action (e.g., run tests before stopping). |
Agent hook example — run tests before Claude stops:
{
  "hooks": {
    "Stop": [
      {
        "hooks": [
          {
            "type": "agent",
            "prompt": "Run the test suite and verify all tests pass. $ARGUMENTS",
            "timeout": 120
          }
        ]
      }
    ]
  }
}
Hooks turn Claude Code into a self-disciplined development partner.
5. Skills: The Evolution of Commands
Skills are the next generation of slash commands — reusable instruction sets that live in their own directories, carry supporting resources, and can be invoked by you or by Claude automatically.
Skills vs Commands
Slash commands have been merged into the skills system. Your existing .claude/commands/ files still work, but skills are the recommended path forward.
| Feature | Old Slash Commands | Skills |
|---|---|---|
| Location | .claude/commands/name.md |
.claude/skills/name/SKILL.md |
| Supporting files | No — single Markdown file only | Yes — scripts, templates, examples, reference docs |
| Invoked by you | Yes, with /command-name |
Yes, with /skill-name |
| Auto-invoked by Claude | No | Yes — Claude reads the description and activates it when relevant |
| YAML frontmatter | Supported (after merge) | Yes — name, description, allowed-tools, model, subagent context |
| Subagent / fork context | No | Yes |
A command says “do this task.” A skill says “whenever you do this type of work, here is the complete standard to follow — and here are the resources to do it right.”
Where skills live
Each skill is a directory inside .claude/skills/, containing a required SKILL.md and optional supporting files. Claude Code auto-discovers them — no need to reference them in CLAUDE.md.
| Scope | Location |
|---|---|
| Project | .claude/skills/<skill-name>/SKILL.md |
| Personal | ~/.claude/skills/<skill-name>/SKILL.md |
Skill directory structure
.claude/skills/
├── testing/
│   ├── SKILL.md              ← Main instructions (required)
│   ├── template.test.ts      ← Test file template
│   └── examples/
│       └── sample.test.ts    ← Example output for Claude to follow
├── api-design/
│   ├── SKILL.md              ← API design standards
│   ├── response-schema.json  ← JSON schema for response envelope
│   └── reference.md          ← Detailed endpoint documentation
└── migrate-component/
    ├── SKILL.md              ← Migration instructions
    └── scripts/
        └── validate.sh       ← Validation script Claude can run
The key advantage: supporting files stay in the skill folder, so Claude can access templates, examples, scripts, and reference docs — all scoped to that specific skill.
SKILL.md format
Every SKILL.md has two parts: YAML frontmatter for configuration and Markdown content with instructions.
---
name: testing
description: Generates unit tests following our Jest + TypeScript standards
allowed-tools: Bash(npm run test), Write(src/**/*.test.ts)
---

## Framework
Jest with TypeScript. All test files end in `.test.ts`.

## Structure
- Group tests with `describe` blocks by function name
- Use `it` statements that read like English sentences
- One assertion per test where possible

## Coverage expectations
- All service functions need unit tests
- All API routes need integration tests
- Edge cases: null inputs, empty arrays, error states

## Mocking
- Use jest.mock() for all external dependencies
- Never hit the real database in unit tests

## Naming
Test files live alongside source: `userService.ts` → `userService.test.ts`

## Resources
- For the test template, see [template.test.ts](template.test.ts)
- For example output, see [examples/sample.test.ts](examples/sample.test.ts)
Key frontmatter fields
| Field | Purpose |
|---|---|
name |
Display name and /slash-command name. Defaults to directory name. |
description |
What the skill does. Claude uses this to decide when to activate it automatically. |
allowed-tools |
Tools Claude can use without asking permission when this skill is active. |
disable-model-invocation |
Set to true to prevent Claude from auto-invoking this skill. |
user-invocable |
Set to false to hide from the / menu (Claude-only skill). |
context |
Set to fork to run in a subagent context. |
How skills get activated
Skills are activated in two ways:
1. You invoke it — type /testing and Claude executes the skill with its full instructions and supporting files.
2. Claude invokes it automatically — Claude sees the skill’s description in context. When your conversation matches (e.g., you ask Claude to write tests), it loads and applies the skill on its own.
No need to reference skills in CLAUDE.md. They are auto-discovered from .claude/skills/.
Example: An API design skill
Create .claude/skills/api-design/SKILL.md:
---
name: api-design
description: Enforces API design standards for all route handlers
---

## Routing conventions
- Use plural nouns for resource endpoints: /users, /orders
- Nest related resources: /users/:id/orders
- Keep nesting to two levels maximum

## Response structure
Always return the envelope defined in [response-schema.json](response-schema.json)

## Error handling
- 400 for validation errors — include field-level details
- 401 for unauthenticated requests
- 403 for unauthorized (authenticated but no permission)
- 404 for missing resources — never expose internals
- 500 for unexpected failures — log internally, return generic message

## Versioning
All routes are prefixed with /api/v1/
Supporting file .claude/skills/api-design/response-schema.json:
{
  "data": {},
  "error": null,
  "meta": { "timestamp": "", "version": "" }
}
Now when you ask Claude to create an API endpoint — or type /api-design — it applies these standards and references the schema file automatically.
Build skills for the areas where you want the most consistency: testing, API design, error handling, component migrations.
6. Subagents: Parallel Specialist AI Workers
Subagents are where Claude Code starts to feel like a team of developers, not a single assistant.
A subagent is an isolated AI instance that handles a specific task — in its own context window, in parallel with other tasks. Each subagent gets its own tools, permissions, and optionally its own model.
Built-in subagents
| Subagent | Purpose | Tools |
|---|---|---|
| Explore | Fast codebase search and file discovery | Read-only (no Write/Edit) |
| Plan | Research during plan mode | Read-only (no Write/Edit) |
| general-purpose | Complex multi-step operations | All tools |
Claude automatically delegates to the right subagent type. Ask it to “search the codebase for deprecated API calls” and it routes to Explore. Ask it to “refactor the auth module” and it uses general-purpose.
Custom subagents
You can define your own specialized agents as Markdown files:
| Scope | Location |
|---|---|
| Project | .claude/agents/<name>.md |
| Personal | ~/.claude/agents/<name>.md |
Example — .claude/agents/code-reviewer.md:
---
name: code-reviewer
description: Expert code review specialist. Use proactively after writing or modifying code.
tools: Read, Grep, Glob, Bash(git diff *)
model: inherit
---

You are a senior code reviewer ensuring high standards of quality and security.

When invoked:
1. Run `git diff` to see recent changes
2. Focus on modified files
3. Begin review immediately

Review checklist:
- Code is clear and readable
- No duplicated code
- Proper error handling
- No exposed secrets or API keys
- Good test coverage

Provide feedback organized by priority:
- **Critical** — must fix before merge
- **Warning** — should fix
- **Suggestion** — consider improving
Now Claude proactively invokes this agent after code changes, or you can ask: “Use the code-reviewer subagent to review my changes.”
Key subagent configuration fields
| Field | Description |
|---|---|
name |
Unique identifier (lowercase, hyphens) |
description |
When Claude should delegate to this subagent |
tools |
Tools the subagent can use (inherits all if omitted) |
model |
sonnet, opus, haiku, or inherit |
maxTurns |
Maximum agentic turns before stopping |
skills |
Skills to preload into the subagent’s context |
memory |
Persistent memory scope: user, project, or local |
isolation |
Set to worktree to run in a temporary git worktree |
How subagents work
- Each subagent runs in its own context window — the main conversation only sees summarized results
- Up to 10 concurrent subagents can run at once
- Subagents cannot spawn other subagents (no infinite nesting)
- Press Ctrl+B to background a running subagent while you continue working
Skills can also spawn subagents
Use context: fork in a skill’s frontmatter to run it as an isolated subagent:
---
name: pr-summary
description: Summarize changes in a pull request
context: fork
agent: Explore
allowed-tools: Bash(gh *)
---

## Pull request context
- PR diff: !`gh pr diff`
- PR comments: !`gh pr view --comments`

## Your task
Summarize this pull request. Highlight breaking changes and areas needing review.
Type /pr-summary — it spawns an Explore subagent with the PR data pre-injected, analyzes it in isolation, and returns a summary to your main conversation.
7. MCP Setup: Connecting Claude to Your World
MCP — the Model Context Protocol — transforms Claude Code from a coding assistant into a workflow orchestrator.
It allows Claude to connect to external tools, services, and APIs — and take real-world actions.
What MCP unlocks
- Query a live database
- Create a GitHub issue
- Post to Slack
- Interact with your CI/CD pipeline
- Browse internal documentation
Configuring MCP
MCP servers are configured in .claude/settings.json:
{
  "mcpServers": {
    "github": {
      "command": "npx",
      "args": ["-y", "@modelcontextprotocol/server-github"],
      "env": {
        "GITHUB_PERSONAL_ACCESS_TOKEN": "your_token_here"
      }
    },
    "postgres": {
      "command": "npx",
      "args": ["-y", "@modelcontextprotocol/server-postgres"],
      "env": {
        "POSTGRES_CONNECTION_STRING": "postgresql://localhost/mydb"
      }
    }
  }
}
Available MCP servers
- GitHub — Manage repos, issues, PRs
- PostgreSQL — Query databases directly
- Slack — Send messages and read channels
- File System — Extended file operations
- Brave Search — Real-time web search
Beginner advice
Start with one MCP server that solves a real pain point.
If you constantly switch between your terminal and GitHub to create issues — connect the GitHub MCP server. Let Claude Code do it for you, in context, without breaking your flow.
Putting It All Together
Project structure
my-project/
├── CLAUDE.md                        ← Project context & standards
└── .claude/
    ├── settings.json                ← Permissions, hooks, MCP servers
    ├── commands/
    │   ├── review-pr.md             ← Legacy command (still works)
    │   └── document.md              ← Legacy command (still works)
    └── skills/
        ├── testing/
        │   ├── SKILL.md             ← Testing skill
        │   ├── template.test.ts     ← Test template
        │   └── examples/
        │       └── sample.test.ts   ← Example output
        └── api-design/
            ├── SKILL.md             ← API design skill
            └── response-schema.json ← Supporting resource
Global structure (your machine)
~/.claude/
├── CLAUDE.md                        ← Your personal preferences
├── settings.json                    ← Global defaults
├── commands/
│   ├── explain.md                   ← Legacy command (still works)
│   └── summarize.md                 ← Legacy command (still works)
└── skills/
    └── explain-code/
        └── SKILL.md                 ← Personal skill, available everywhere
With this setup, every Claude Code session starts with full project context, enforces your standards automatically, executes your workflows on demand, and can reach out to external tools when needed.
Your First Week Checklist
Getting started doesn’t have to be overwhelming. Take it step by step.
Day 1: Create your CLAUDE.md with project overview, architecture, and key rules.
Day 2: Configure basic permissions — allow reads and writes to your source folder, allow test and lint commands.
Day 3: Create two or three slash commands for your most repeated tasks.
Day 4: Add one or two PostToolUse hooks — start with auto-linting.
Day 5: Write your first skill file for the area where you want the most consistency.
Week 2: Set up one MCP server that connects to a tool you use daily.
Week 3 onwards: Explore subagents for parallelizing complex, multi-part tasks.
Conclusion: Configuration Is the Leverage
Installing Claude Code takes five minutes.
Configuring it well is what separates developers who get 10% productivity gains from those who get 10x leverage.
The components covered in this guide — CLAUDE.md, Settings, Commands, Hooks, Skills, Subagents, and MCP — are not advanced features reserved for power users.
They are the foundation.
Master them now, and you’ll build a development environment that works with you — not just for you.
This is Part 2 of a series on Claude Code. Read Part 1: Getting Started with Claude Code — A Strategic Guide for Developers to understand the strategic landscape before going hands-on.

Leave a comment